How to Overlay a Picture on a Video in CapCut 2025
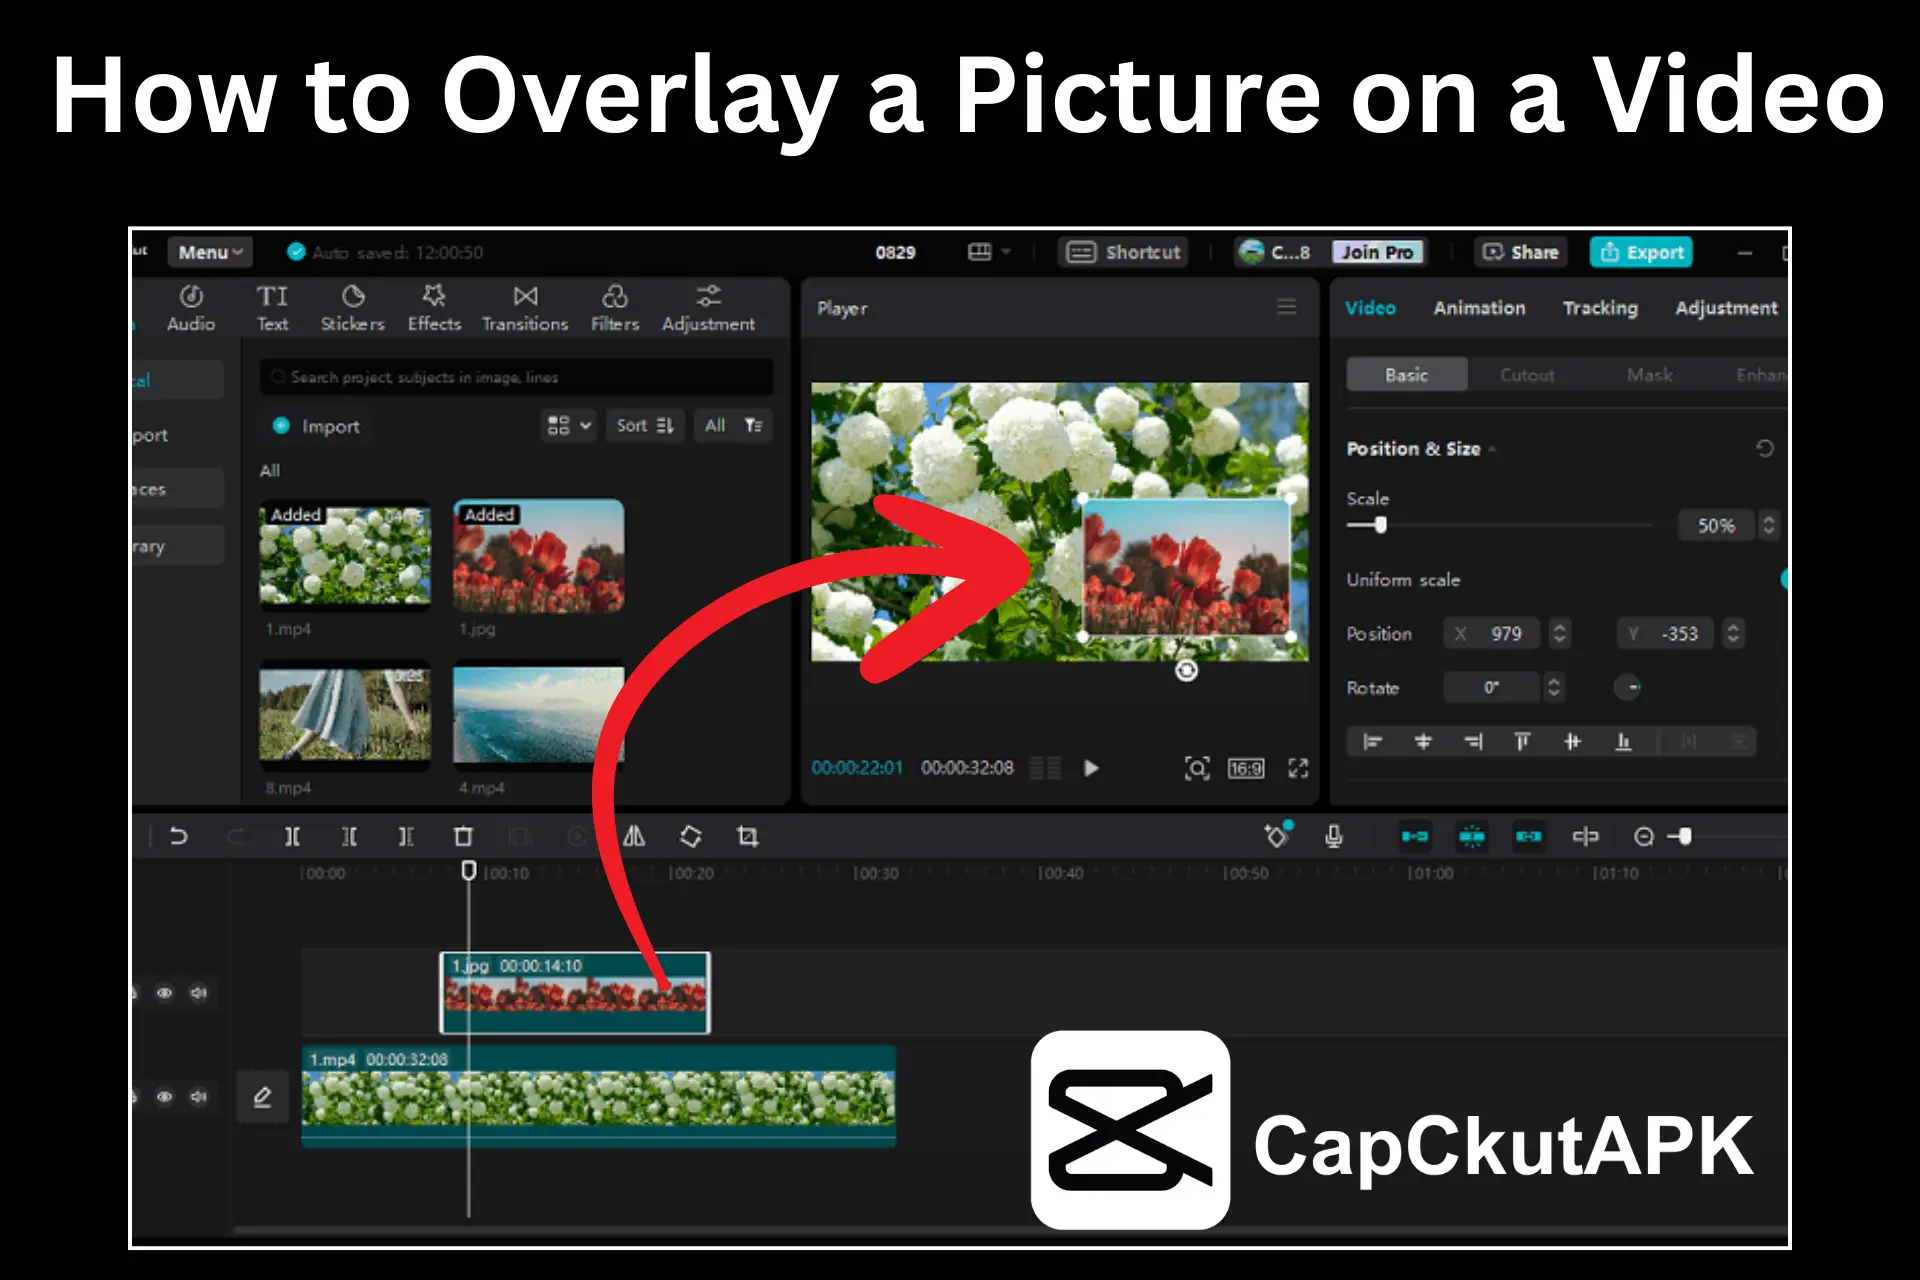
An Overlay means when you add a photo, text, sticker, or another clip of video on top of your main video. It appears together with your video on the screen. It allows you to add some extra details to give a clear and new look to your video. It helps to add steps and screenshots in your tutorial vlogs. So, if you want to add the overlay pictures, CapCut has made it easy. In CapCut MOD APK, you can easily edit videos with overlay pictures. It enables you to adjust the size, position, timing, and animation of the overlay pictures.
Why Overlay a Picture on a Video in CapCut?
Overlaying pictures on CapCut videos helps people understand your video easily. You can add pictures to highlight the important parts in your video. These can be screenshots, arrows, stickers, or your logo. Overlays are really useful for tutorial videos to explain the steps. This feature is also helpful to add some personal photos to your vlogs or memory videos. So, using overlays on your CapCut videos gives them a clean and professional look for further use.
Steps to Overlay Pictures on a CapCut Video
Create a New Project
Create a New Project in CapCut and select the required video. Place the video in your timeline.
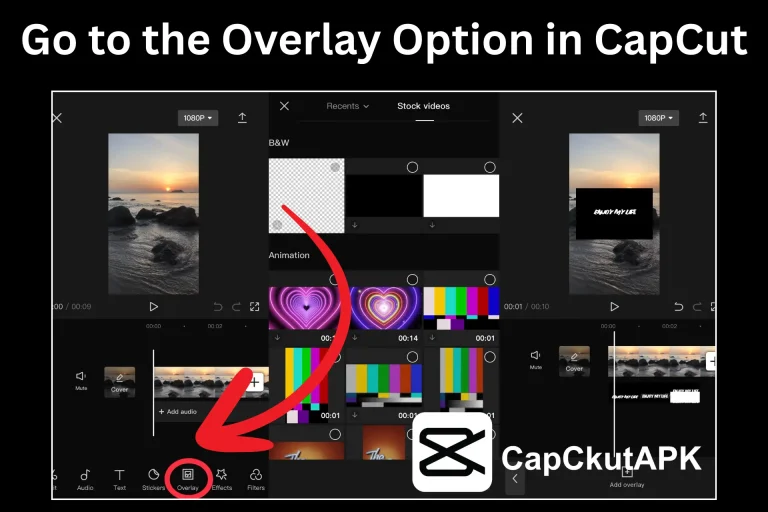
Go to the Overlay Option
Look at the bottom menu to open Overlay options.
Add Your Picture
- Tap the Add Overlay option and choose the picture from your device.
- The picture will be added to the timeline as a separate layer. It will be added above your video.
Resize and Place Picture
- Change the size of the overlay picture.
- Add the picture where you want it to show on the screen.
Set How Long Picture Stays
- On the timeline, your picture will appear as a bar above your video layer.
- Drag the edges of this bar to set when the picture should appear and how long it will stay on the screen during your video.
Add Animation
- You can add movement to your pictures. Animation will help them slide or fade into your video. It will give a smooth transition effect.
Change Opacity
- Find the opacity option at the bottom of the screen.
- Move the slider left to make the picture more transparent.
- Stop when it blends nicely with your video.
Preview Video
- Play the video and watch it carefully to check the overlay pictures on CapCut videos.
Save and Export Video
- Once you think the overlay is perfectly done, save and export your video to your device.
Tips for Clean Overlaying in CapCut
It is really important to place the overlay pictures carefully on your videos. Here are some easy ways to keep your overlays neat and clear:
Conclusion
Overlays are really easy to add to CapCut videos. With overlays, our videos will look more professional. It helps you share the information and highlight the important points of your video. Overlays also help in branding your brand by adding the logos to videos. So, use the tips and follow easy, quick steps to highlight your video by adding overlays.
FAQs-Frequently Asked Questions
How many overlay pictures can I add to CapCut videos?
You can add as many overlay pictures as you need. There is no limit for the overlay picture on CapCut videos.
Do I need to pay to use overlays in CapCut?
The overlay feature in CapCut is free. You can use it without any CapCut purchase.
Can I use the overlay feature for the mobile app of CapCut?
You can use the overlay feature on the CapCut mobile app, PC, and online editor.

